

After an endless search using Google and Bing on how to install PowerPrep GRE software on my older son’s computer which uses the Vista Operating System, I have found bits and pieces on the puzzle on various websites. However, I did not find the entire solution anywhere.
Therefore, I played with the many pieces of the puzzle solution that I found, added a few of my own and finally came up with a complete solution to this problem.
I have decided to share this solution in this blog as I know that many college seniors to be, have the summer off right now and would probably like to spend some time preparing for their GRE exams which is required for admission to many graduate schools.
First download and install the great WinRar compression utility software from this site:
http://download.cnet.com/WinRAR-32-bit/3000-2250_4-10007677.html
It is free to use and try for 40 days.
Now, download the PowerPrep GRE test prep software from this site:
http://www.ets.org/gre/general/prepare/powerprep/download/
Ignore the install instructions listed there as they only work if your operating system is Windows XP operating system or below.
Instead, right click on the file and click on,”RUN AS ADMINISTRATOR”.

Right click on it again and click on, “PROPERTIES”. Then click on the COMPATIBILITY tab on the top.
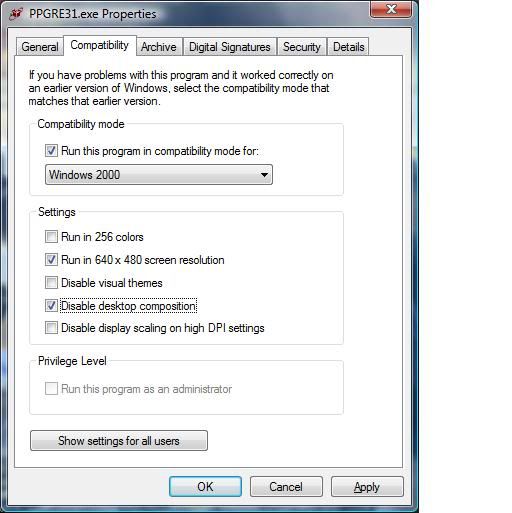
Now click on the square next to COMPATIBILITY mode so that a check-mark appears in the square. Click on the arrow below it and select, “Windows 2000”. Now click on the squares next to, RUN in 640 x 480 screen resolution and Disable Desktop Composition so that check-marks appears in the squares, Now click on APPLY and then OK.
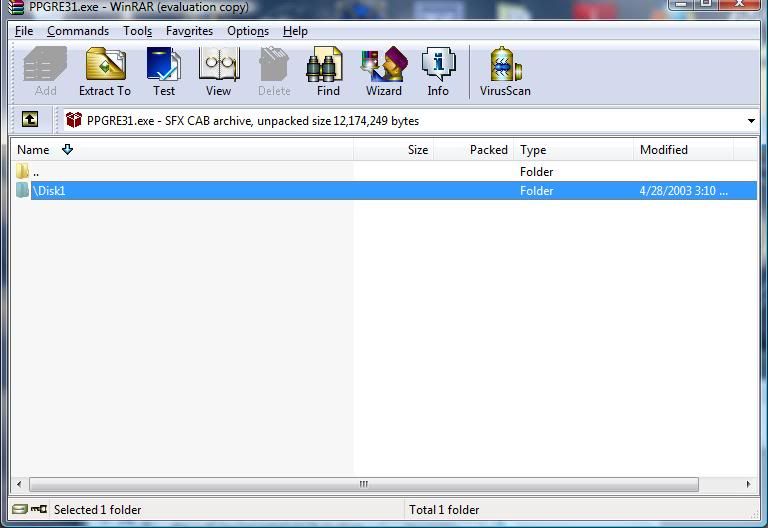
Now right click on the file PGRE31 and select, “OPEN WITH WinRAR”. It is very important not to extract the files with another other program. Only the WinRAR compression utility will extract the files using the correct length names that will allow the program to work and install in compatibility mode.

Select CLOSE on the window that appears.

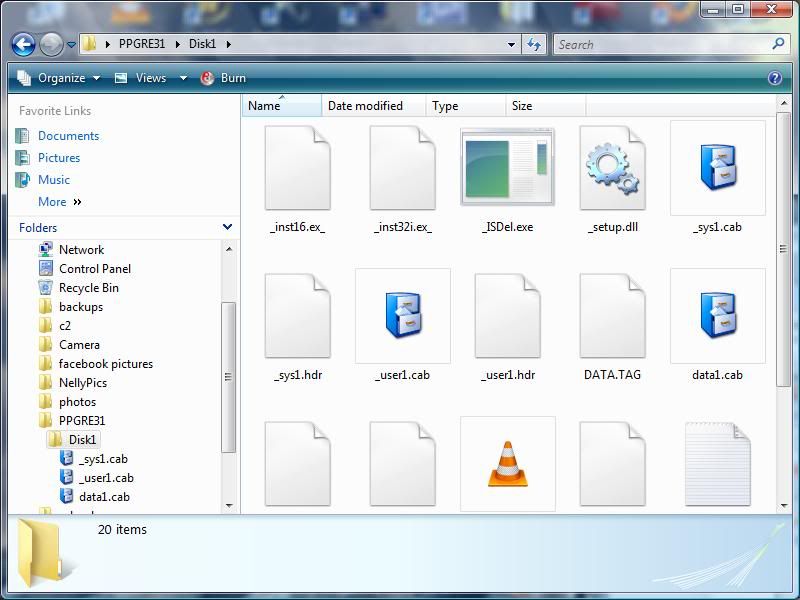
As soon as you close the window, the window shown below will appear. Now double click on the yellow folder shown in the window right underneath the word, “NAME” and the green arrow. Then select Disk1 and then click on, “EXTRACT TO”, right under the main menu on top of the program.
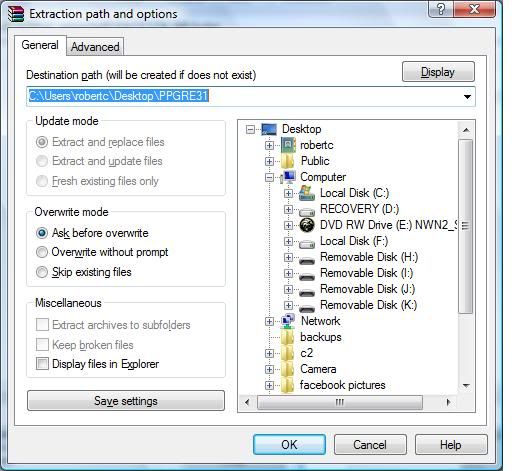
A window will appear like the one shown below asking you where to save it to, select the DESKTOP and click on OK..
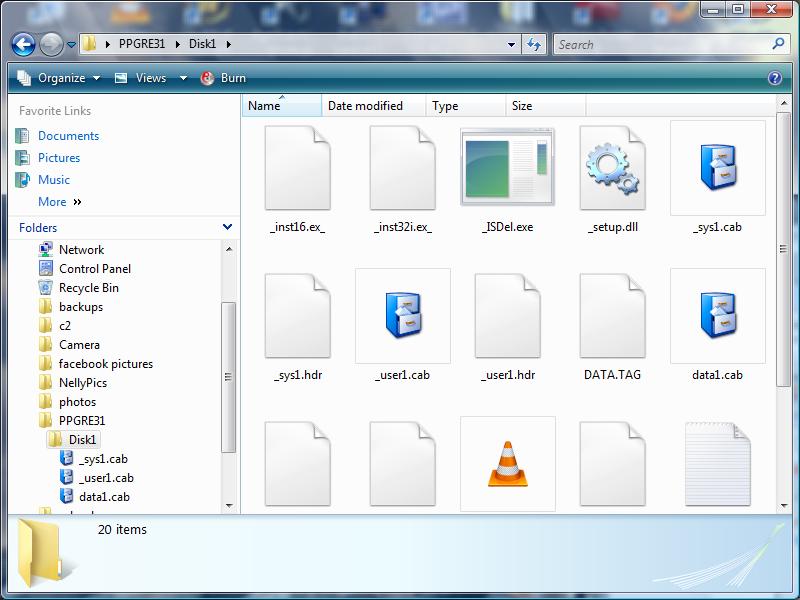
The software will create a folder called PPGRE31 and extract all files to that folder. Now find the folder, double click it and you should see another folder called DISK 1. Double click on it. You should now see a window like this one.
Close the folders and now go to the start menu and click on RESTART. Press the F8 key just as your computer is restarting. Select, “Restart in safe mode with Networking”.
When the computer finishes booting, right click on the icon of my Computer icon and select,” EXPLORE”. At the top of the screen, click the arrow pointing down to select, DESKTOP.

If it does not appear on the list, just type next to the right arrow,” DESKTOP “. The following steps were also completed earlier in this guide and are repeated here and applied to a totally different file this time. This new file may or may not have inherited the same settings from the first time these instructions were followed.
Now scroll down and find the PPGRE31 folder and double click on it. Then find the folder named, “DISK 1″ double click on it and now right click on the file named,” SETUP” with the green color icon.
Click on,”RUN AS ADMINISTRATOR”. Right click on it again and click on, “PROPERTIES”. Then click on the COMPATIBILITY tab on the top. Now click on the square next to COMPATIBILITY mode so that a check-mark appears in the square.
Click on the arrow below it and select, “Windows 2000”. Now click on the squares next to, RUN in 640 x 480 screen resolution and Disable Desktop Composition so that check-marks appears in the squares, Now click on APPLY and then OK. Now double click on Setup and your software should install correctly. Now restart your computer in regular mode.
Now go to PROGRAMS, then click on POWERPREP and then on GRE_POWER_PREP. Your program will start, your screen resolution will change a bit and you can now run this software correctly.
If you followed this blog and the instructions worked for you, please consider leaving a message on this blog.